
W12: Molding and casting


Week 11 is done, today we begin a new week, new assignmets and new challenges. For week 12 that has just started and is going to be about Molding and casting. During this week we need to use some machines, some materials and of course a good attitude for what is coming. So now join me in this new week journey and see what comes along, always hoping for the best. Basically the idea is to design a mold, machine it and cast it. This are the assignments I have to complete:

This week assignmets are:

Group assignments:

Individual assignments:

In this week assignments i'm using:

Equipment Materials
  • ShopBot or
  • 3D printer
  • Yeast type III
  • Acrylic
  • Resin
  • Resin hardener
  • Gloves
  • Face mask
  • Safety goggles

ShopBot CNC

ShopBot CNC

A CNC (computer numeric control) tool is used in prototyping and full production for cutting, carving, machining and milling in a variety of materials including wood, mdf, plastics, foams and aluminum. ShopBot Tools, like all CNC tools, move a cutter around a big table (X and Y axes) and move it up and down as well (Z axis) allowing it to make 3D movements and cut all sorts of shapes. The cutter looks like a drill bit and is spun by a motor called a router or spindle.

It can create virtually any pattern or shape and will do it in materials such as wood, plastic, foam, aluminum and many composites. You use the included software to design your parts on your personal computer, then, like a robot, the computer controls the cutter to precisely cut your parts. Now, all the types of computer-driven tools that create things by cutting material away (such as CNCs or laser cutters) or building up material in layers to create an object (3D printing) are called digital fabrication tools.

Unlike a drill bit, a router bit is designed to cut from the sides as well as the tip. By precisely moving the cutter through material, it can create virtually any pattern or shape and will do it in materials such as wood, plastic, foam, aluminum and many composites.


Data from: ShopBot CNC


3D printer

What is a 3D printer?

3D printers use CAD to create 3D objects from a variety of materials, like molten plastic or powders. 3D printers can come in a variety of shapes and sizes ranging from equipment that can fit on a desk to large construction models used in the making of 3D-printed houses. There are three main types of 3D printers and each uses a slightly different method.

Data from: 3D printer

What is 3D printing?

Is a process of making three dimensional objects from a digital file. The creation of a 3D printed object is achieved using additive processes. In an additive process an object is created by laying down successive layers of material until the object is created. Is a process in which a digital model is turned into a tangible, solid, three-dimensional object, usually by laying down many successive, thin layers of a material. 3D printing is the opposite of subtractive manufacturing which is cutting out / hollowing out a block of material with for instance a milling machine.

Data from: 3D printing


Group assignments


A). Yeast safety datasheets

To begin with the assignments it's important to know about the materials we are going to use. For the mold I decide to use yeast type III. Before we begin, we have to make sure about the sacurity and safety measures. So here it is what we have to know:
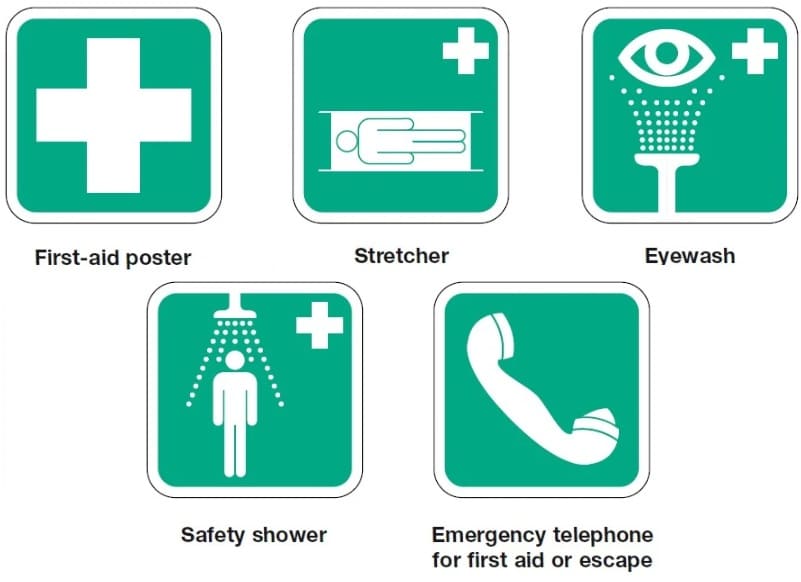

Safety measures yeast

A1). First Aid Measures

A2). Working area

A3). Personal protection

  • Don't swallow, touch your eyes or skin.
  • In the event of splashes or contact with eyes: Wash thoroughly with fresh, clean water for 15 minutes holding the eyelids open. If there is any redness, pain, or visual impairment, consult an ophthalmologist.
  • In the event of splashes or contact with skin: Watch out for any remaining product between skin and clothing, watches, shoes, etc.
  • In the event of any of swallowing: Seek medical attention, showing the label.
  • In case of persisting symptoms, always call a doctor or visit your nearest hospital.

Data from: First Aid Measures

  • Obey the measures indicated on the pictograms.
  • Make sure your working area is appropiate.
  • Make sure that the working area has an adequate ventilation, especially in confined areas.
  • Don't eat, drink, or smoke during use or near materials/equipment.
  • Remove and wash contaminated clothing before re-using.

Data from: Personal safety

  • Wear appropiate protective equipment, such as gloves, safety goggles and lab coat.
  • Use personal protective equipment that is clean and has been properly maintained.
  • Avoid contact with eyes. Before handling powders or dust emission, wear mask googles in accordance with standards EN166.
  • Wear suitable protective gloves in the event of prolonged or repeated skin contact.
  • Work clothing worn by personnel shall be laundered regularly. After contact with the product, all parts of the boy that have been soiled must be washed.
  • Avoid beathing dust. Wear a disposable half-mask dust filter in accordance with standard EN149.

Data from: Personal safety

B). Acrylic safety datasheets

For my first casting example I'll try acrylic and as we did with yeast lets leearn important points regarding safety: :


Acrylic safety measures

B1). Acrylic first aid Measures:

B2). Exposure control

B3). Personal protection

  • Emergency and first aid procedures in case of Inhalation: Take the patient to a ventilated place.
  • In case of eye contact: Immediately flush eyes with plenty of water, keeping the eyelids open. Go to the ophthalmologist.
  • In case of skin contact: Wash skin immediately with plenty of water. Remove contaminated clothing. If symptoms (irritation or blisters) occur, see a doctor.
  • In case of ingestion: Drink plenty of water. Go to the doctor.
  • Most important symptoms and/or effects (acute and/or delayed): May cause allergy symptoms or respiratory tract irritation if inhaled. May cause damage to organs (lungs, kidneys, and liver) through prolonged or repeated exposure.

Data from: First Aid Measures

  • Respiratory equipment: Use suitable protective equipment. If exposure to values above the occupational exposure limit is foreseeable.
  • Use an appropriate mask with a type A filter. In case of formation of high amounts of vapor, use an autonomous respirator.
  • Eye protection: Safety glasses and full protection face shield.
  • Gloves: Consider physical resistance, degree of sensitivity, level of permeability. For example you can use: PVA/Polyethylene, laminates or PVA coatings, Butyl and nitrile rubber gloves.
  • Don't wear watch, bracelet, rings or accesories that could harm you while a using the acrylic, etc.

Data from: Acrylic safety precautions

  • Wear appropiate protective equipment, such as gloves, safety goggles and lab coat.
  • Use personal protective equipment that is clean and has been properly maintained.
  • Avoid contact with eyes. Before handling powders or dust emission, wear mask googles in accordance with standards EN166.
  • Wear suitable protective gloves in the event of prolonged or repeated skin contact.
  • Work clothing worn by personnel shall be laundered regularly. After contact with the product, all parts of the boy that have been soiled must be washed.
  • Avoid beathing dust. Wear a disposable half-mask dust filter in accordance with standard EN149.

Data from: Personal safety

C). Resin safety datasheets

For a second casting example I will use Resin. So, as we did with yeast and acrylic lets see important points regarding safety:


Epoxy Resin Part A

C1). Hazard Statements

C2). Description of first aid measures

Causes skin irritation

May cause an allergic skin reaction.

Causes serious eye irritation.

Toxic to aquatic life with long lasting effects

Inhalation: Move the exposed person to fresh air at once. Keep the affected person warm and at rest. Get prompt medical attention.

Ingestion: Do not induce vomiting! Rinse mouth thoroughly. Promptly get affected person to drink large volumes of water to dilute the swallowed chemical. Get medical attention immediately!

Skin contact: Rinse the skin immediately with lots of water. Get medical attention if any discomfort continues.

Eye contact: Remove victim immediately from source of exposure. Make sure to remove any contact lenses from the eyes before rinsing. Promptly wash eyes with plenty of water while lifting the eye lids. Continue to rinse for at least 15 minutes and get medical attention.


Data from: Resin safety Datasheet.


Individual assignments


A). Design a mold around the process you'll be using

For this initial part i'm using yeast type III to make the mold. According to the instructions on the yeast bag it indicates to use water and the yeast. The mixture should be in the next proportions:
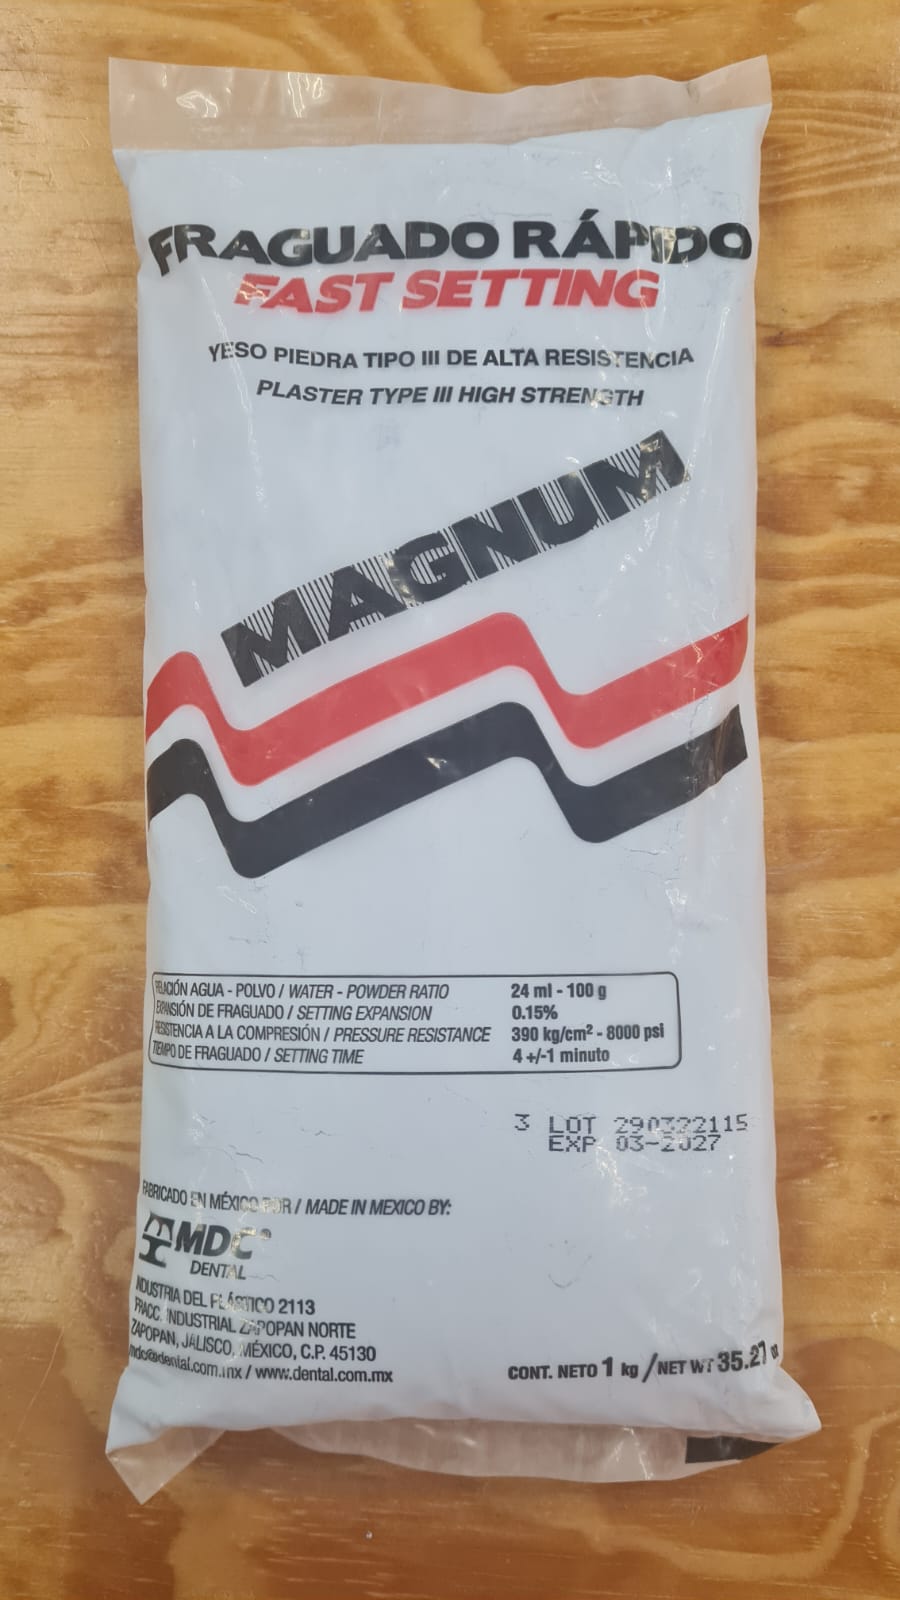
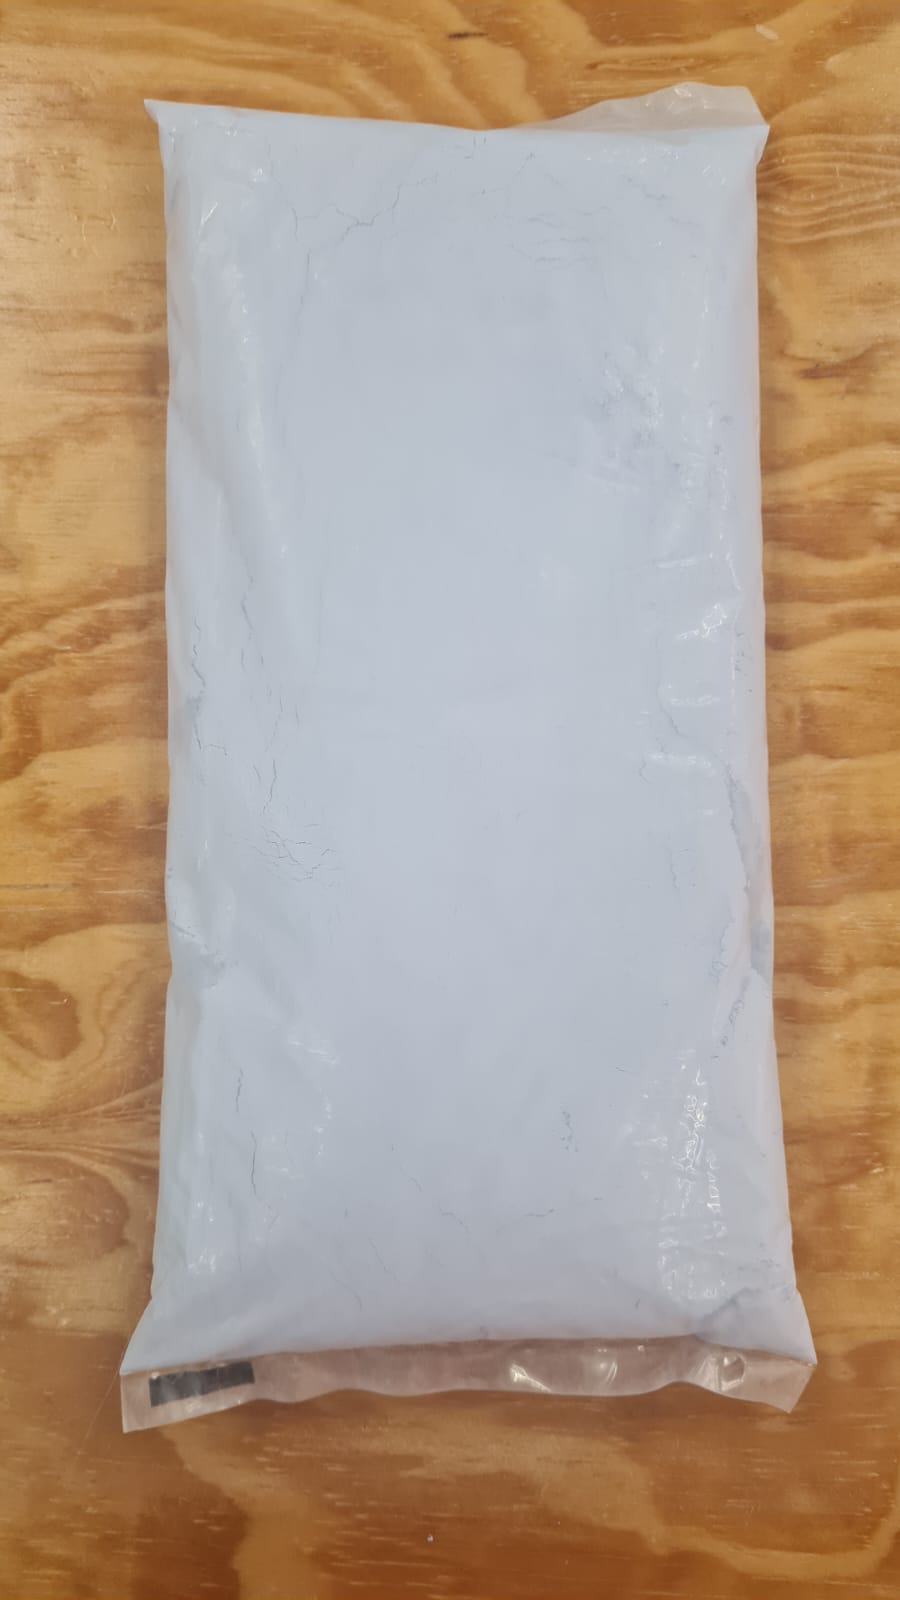
So, I prepare all the materias I was going to use and start my mold. Lets see the results I got from my test #1 mixture. In the next images yo can see that the mix work better that the first results that are shown in the P.I.C.N.I.C section.

A1.1) Result #1

They recommend it me to prepare the mixture as if I was preparing pancakes and put a plastic bag in the container. So I gave it a try

Result: The mixture result was much better than the first 3 tries. As I was mixing a was pouring water and yeast until I got a much better consistency.


A1.2) Result #2

Once I had the consistency of the mixture, I use a box of gloves. It wasn't as big as the wooden box I use in the first result.

Result: Again, the mixture was ok, but didn't like the final result because of the box.

A1.3) Result #3

So for the next result I use a house plastic container, but first I put some baby powder so that it would not be so difficult to remove the mold. It helped.

Result: This was a much better result, I really like it. The mold has a smooth look.

A1.4) Result #4

And I did 2 more test and the results were very good. In this one I use a plastic container and a yeast and acrylic separator.

Result: Both results were very good.

B). Produce it with a smooth surface finish.

B1). SolidworksDesign

In this part I will start my cast using one of the molds. Before using the shopbot I had to prepare the design, which I use solidworks and Fusion.

B2). Preparing files for the shopbot with fusion

For the next part I'll use the 1/4" flat end mill for the first part, the rough part. In this first part you can see in the image below that it has some lines, doesn't look "smooth", now the cut is nice. After the first cut and i'm using the 1/8” ball end mill for the final cut. This end mill will give a nice smoother finish. I use Fusion 360 to configure and prepare the file so I can use them in the ShopBot. You can see in two video simulations of the process i'm using to prepare de mold and two images of the result of each cut.


In the next two videos you can see how the shopbot works with yeast mold.

C). Use it to cast parts.

C1). Yeast and acrylic

For the casting I'm using quick self-curing acrylic. I need three parts of powder for one volumetric part of the liquid. So, I'm using 120g of the powder and 40ml of the liquid. Before starting mixing I saw that the quantities were too much, so I decided to reduce them and while mixing add more liquid or powder depending on texture of the mixture. So lets start:


C2). 3D printing and Acrylic

For my next mold I use a 3D printed cast and acrylic. In this part I had a problem taking out de acrylic. Practically I had to destroy the 3D mold. I use several screwdrivers and start to pull and pull, I use a cutter for at least 1 hour. And I ended cutting my thumb but finally I could take the chicel out of the mold. You can see in the images how it looks.

So I did it again, but this time I use the acrylic separator, below in the image you can see the final result wasn't that bad. The chisel form correctly in the 3D cast, maybe for next time different type of filament, making a 2 piece mold, adding an additive or a release agent.


I had to cut the side part because I put too much of the mixture but the result looks good.


P.I.C.N.I.C section


A1.1).Test result #1

I follow the indications and make sure the quantities of water and yeast were correct.

Result: Once the mixture was dry, as can be seen in the image, it breaks easily.

A1.2).Test result #2

I try adding more water then what indications recommend and the same amount of yeast.

Result: Once the mixture done, as can be seen in the image, I put too much water. You can actually see it's humid.

A1.3).Test result #3

I try again add water and yeast with no specifically quantities.

Result: Once the mixture done, it started to harden very quickly. It didn't work.


Final part


Files

In this part you can download the files I use for this week assignments.

Conclusions and recomendations

What did I learn in this week?